How to uninstall Yoast SEO for Shopify
In most cases, when you have Yoast SEO for Shopify installed and it is working properly, you will not need to touch any code. You’ll be able to control all settings and features via your admin, and the app will automatically output the correct code based on your settings. However, if you want to uninstall Yoast SEO, you will need to remove the changes the app made to your theme and delete the app to cancel your subscription. You can deactivate and delete Yoast SEO automatically in the Yoast SEO settings. You can also manually remove the Yoast SEO code from your theme. In this guide, we give you a step-by-step explanation of both options. In addition, you can export your SEO data in a CSV file.
Table of contents
Exporting your SEO data
Before you remove Yoast SEO from your site, you may want to export the SEO settings. You can do that with the Bulk editor in Yoast SEO.
Automatically removing Yoast SEO
To automatically remove Yoast SEO’s code from your theme and cancel your subscription, follow the steps below.
Note: To cancel your subscription, you will need to deactivate and delete the app.
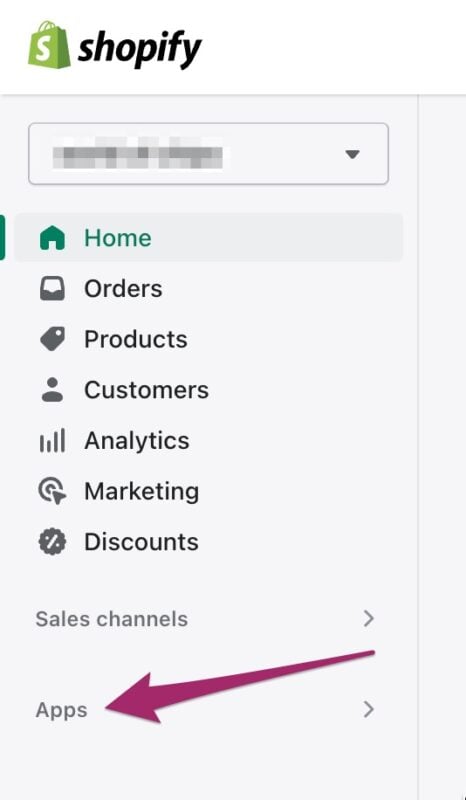
- Go to the Apps menu in your Shopify admin and select Yoast SEO from your list of apps.
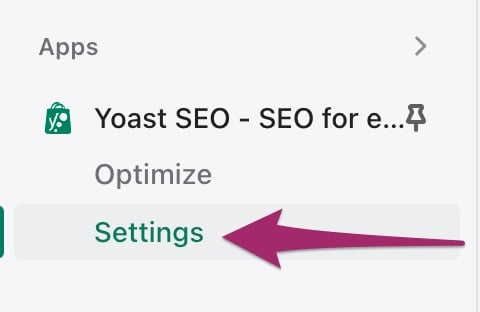
- Select the Settings menu item below Yoast SEO.
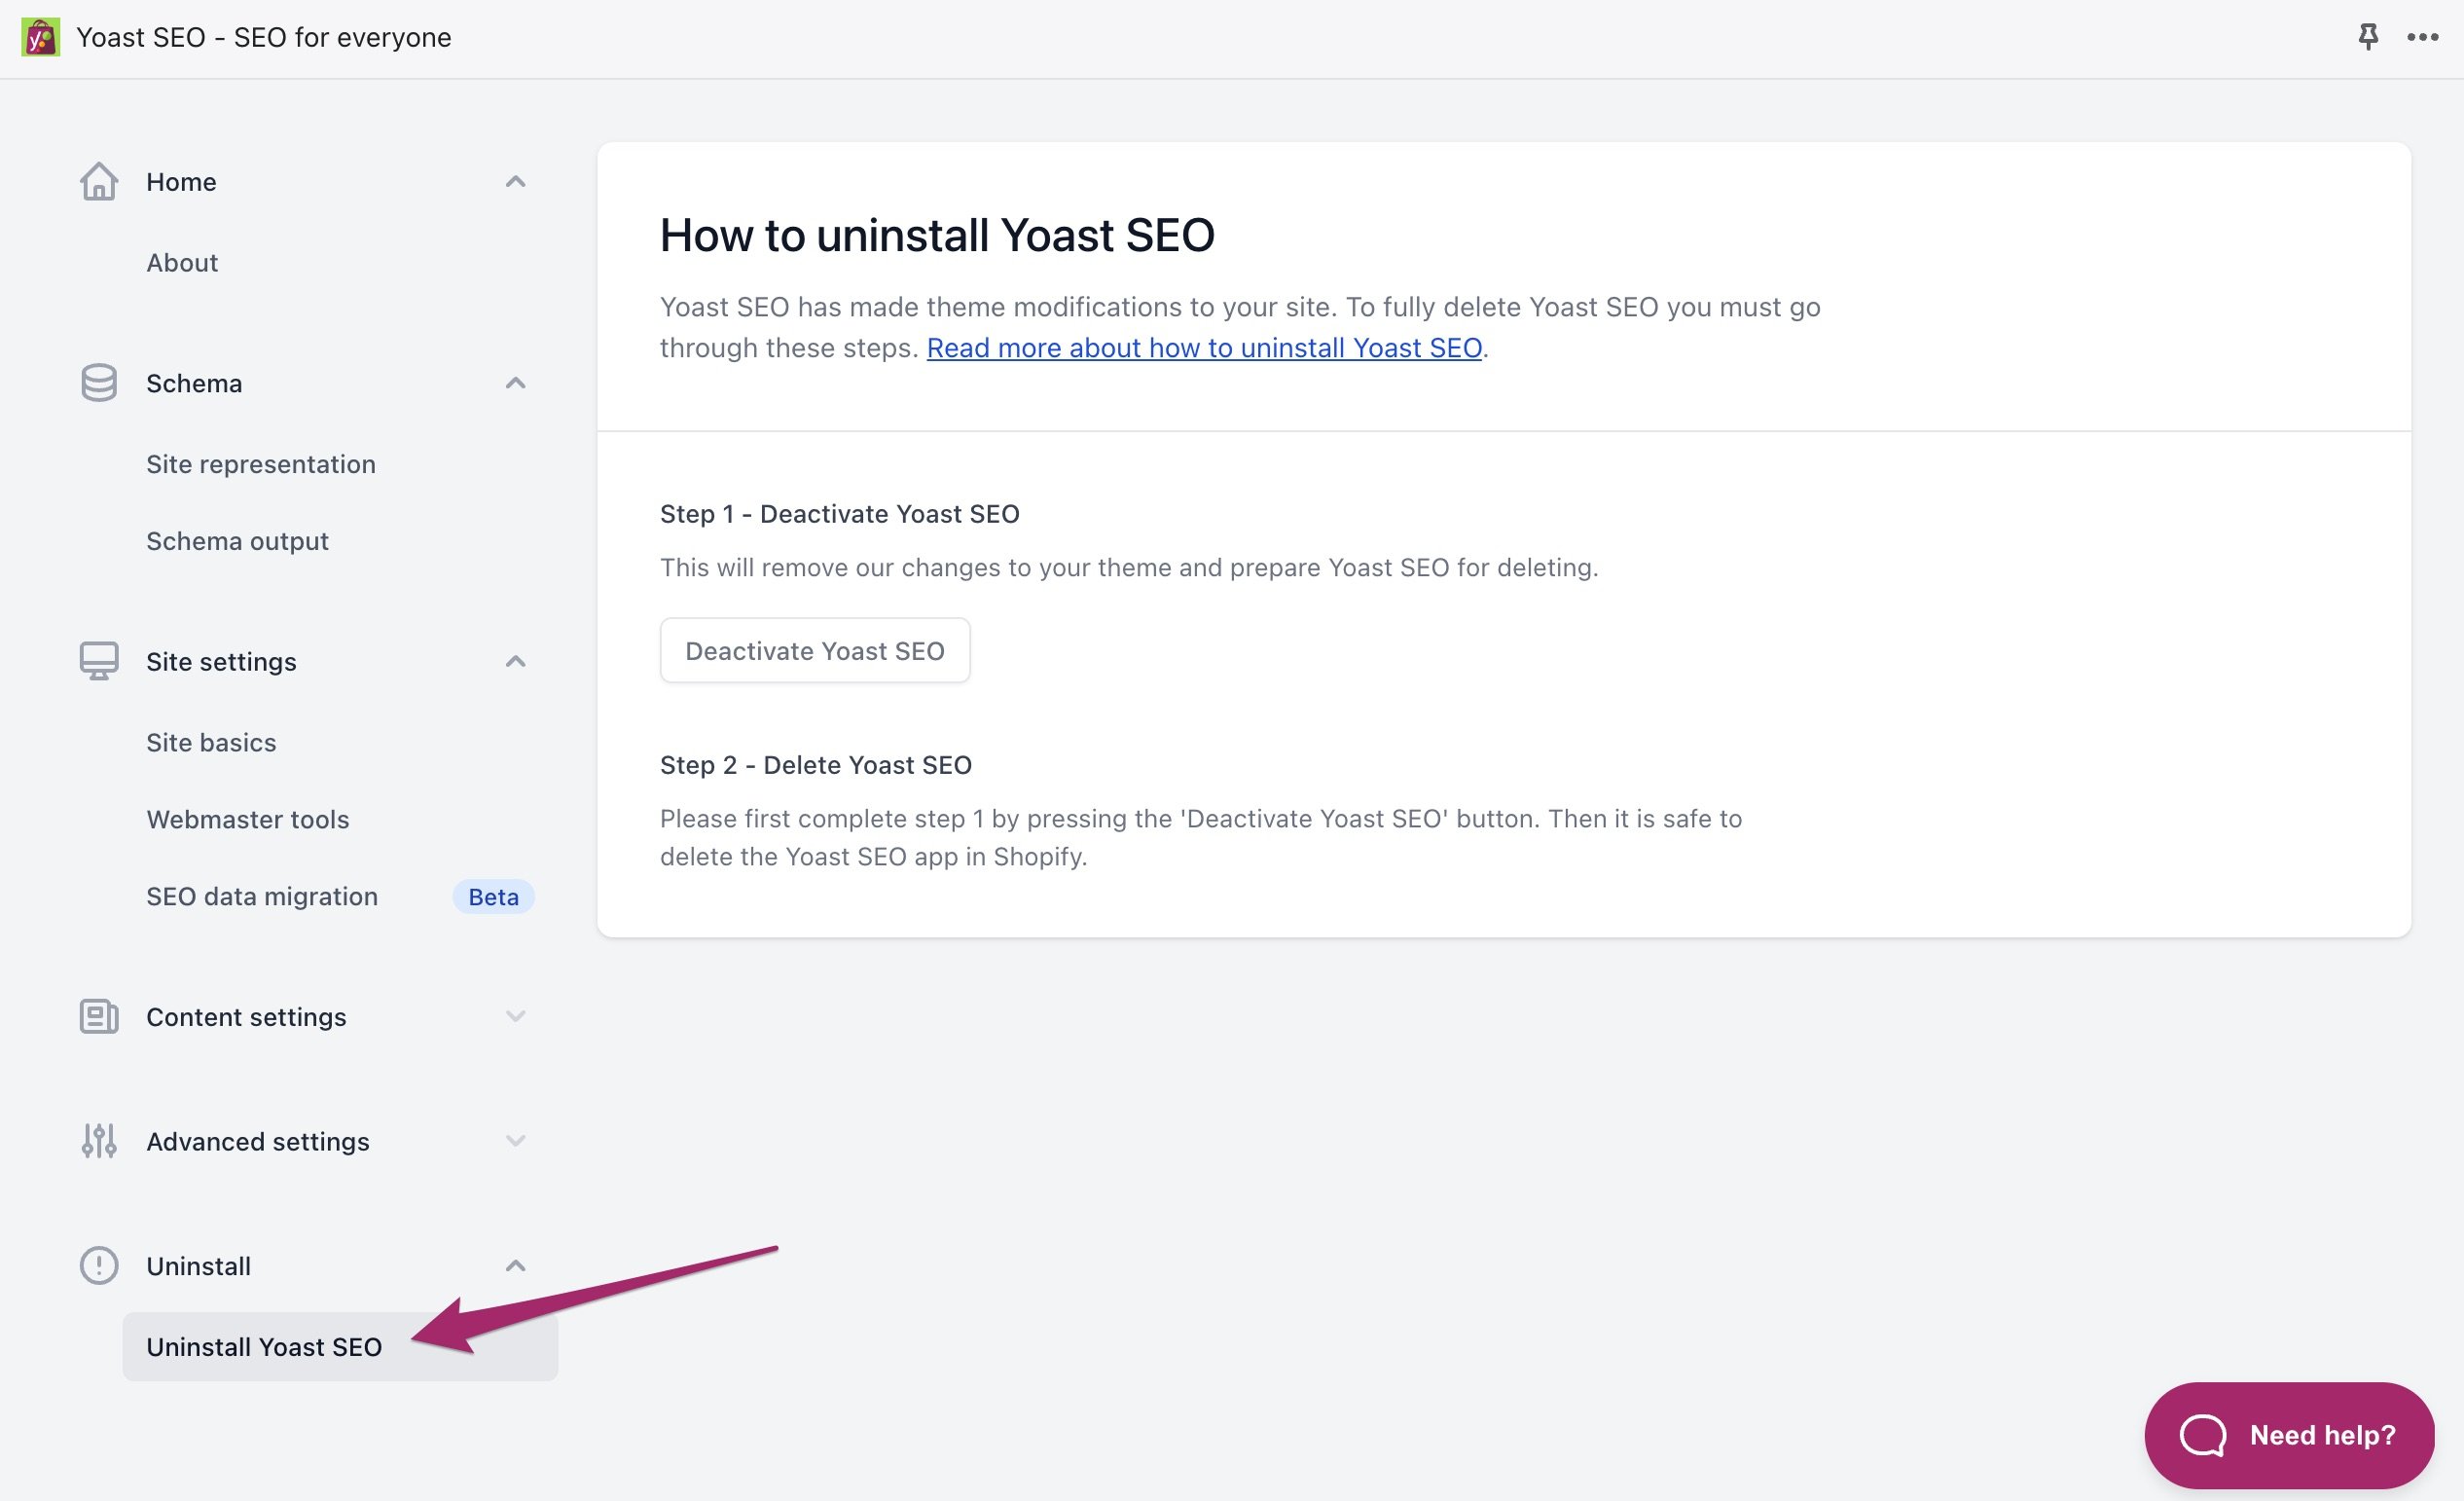
- Еxpand the Uninstall tab of the Yoast SEO Settings and click Uninstall Yoast SEO.
You will see the Uninstall settings screen.
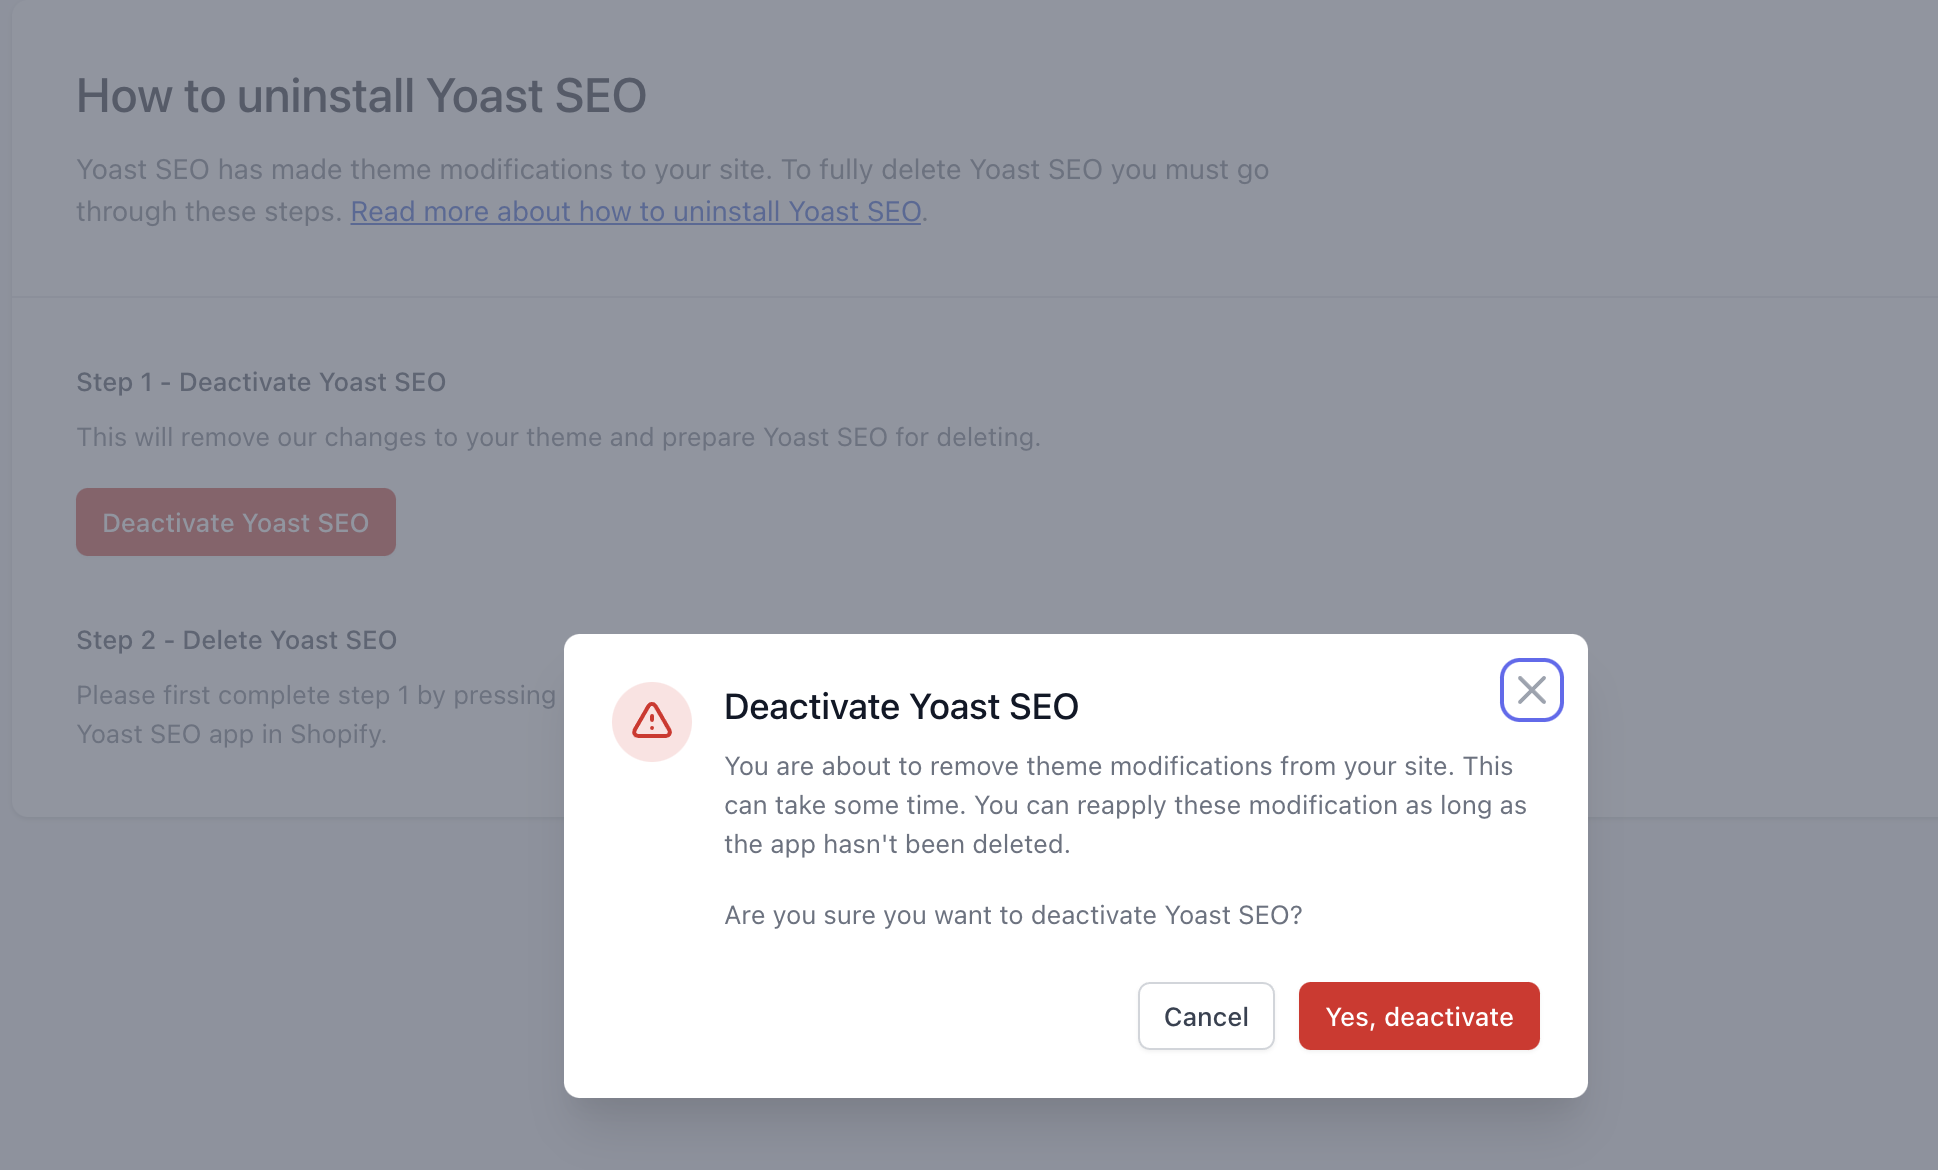
- Click the Deactivate Yoast SEO button.
Read the instructions in the dialogue box (shown in the screenshot below), and if you are sure you want to deactivate the app, confirm it by clicking the red button. Deactivating may take some time. Once the process is done, you will see a notification that the app is no longer active and any changes the app made to your code were removed.
- If you’ve deactivated Yoast SEO, but then you’ve changed your mind, you can reinstall it by clicking the Activate Yoast SEO button.

- If you want to remove Yoast SEO from your Apps and cancel your subscription, click the link in step 2 of the Uninstall settings.
Clicking the button will take you to your Apps screen.
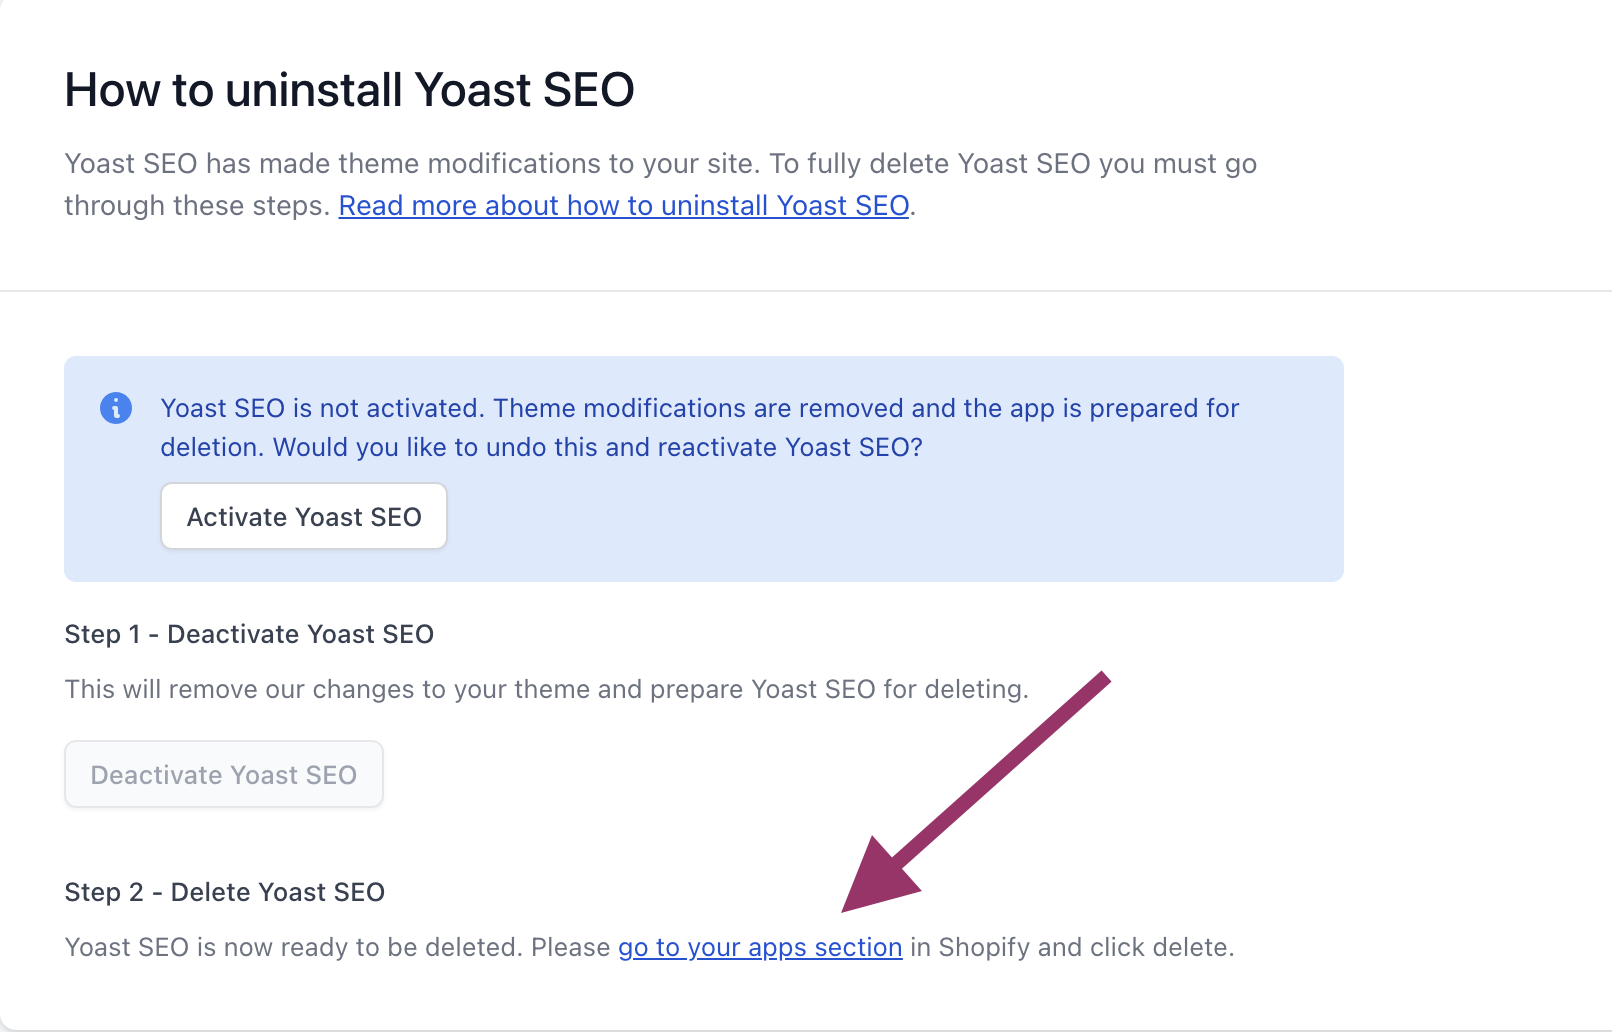
- In the Apps screen, click the Delete option next to the Yoast SEO app to remove it from your site.

Would you rather watch a video of this process? Check out the screencast below, where we explain how you can safely deactivate and delete Yoast SEO for Shopify!
Manually removing the Yoast SEO code from your Shopify theme
If you prefer, you can also just manually remove the Yoast SEO code. To do that, follow the steps described below.
- In your Shopify Admin, select Online store and then Themes (outlined in the image below).
The themes screen will open.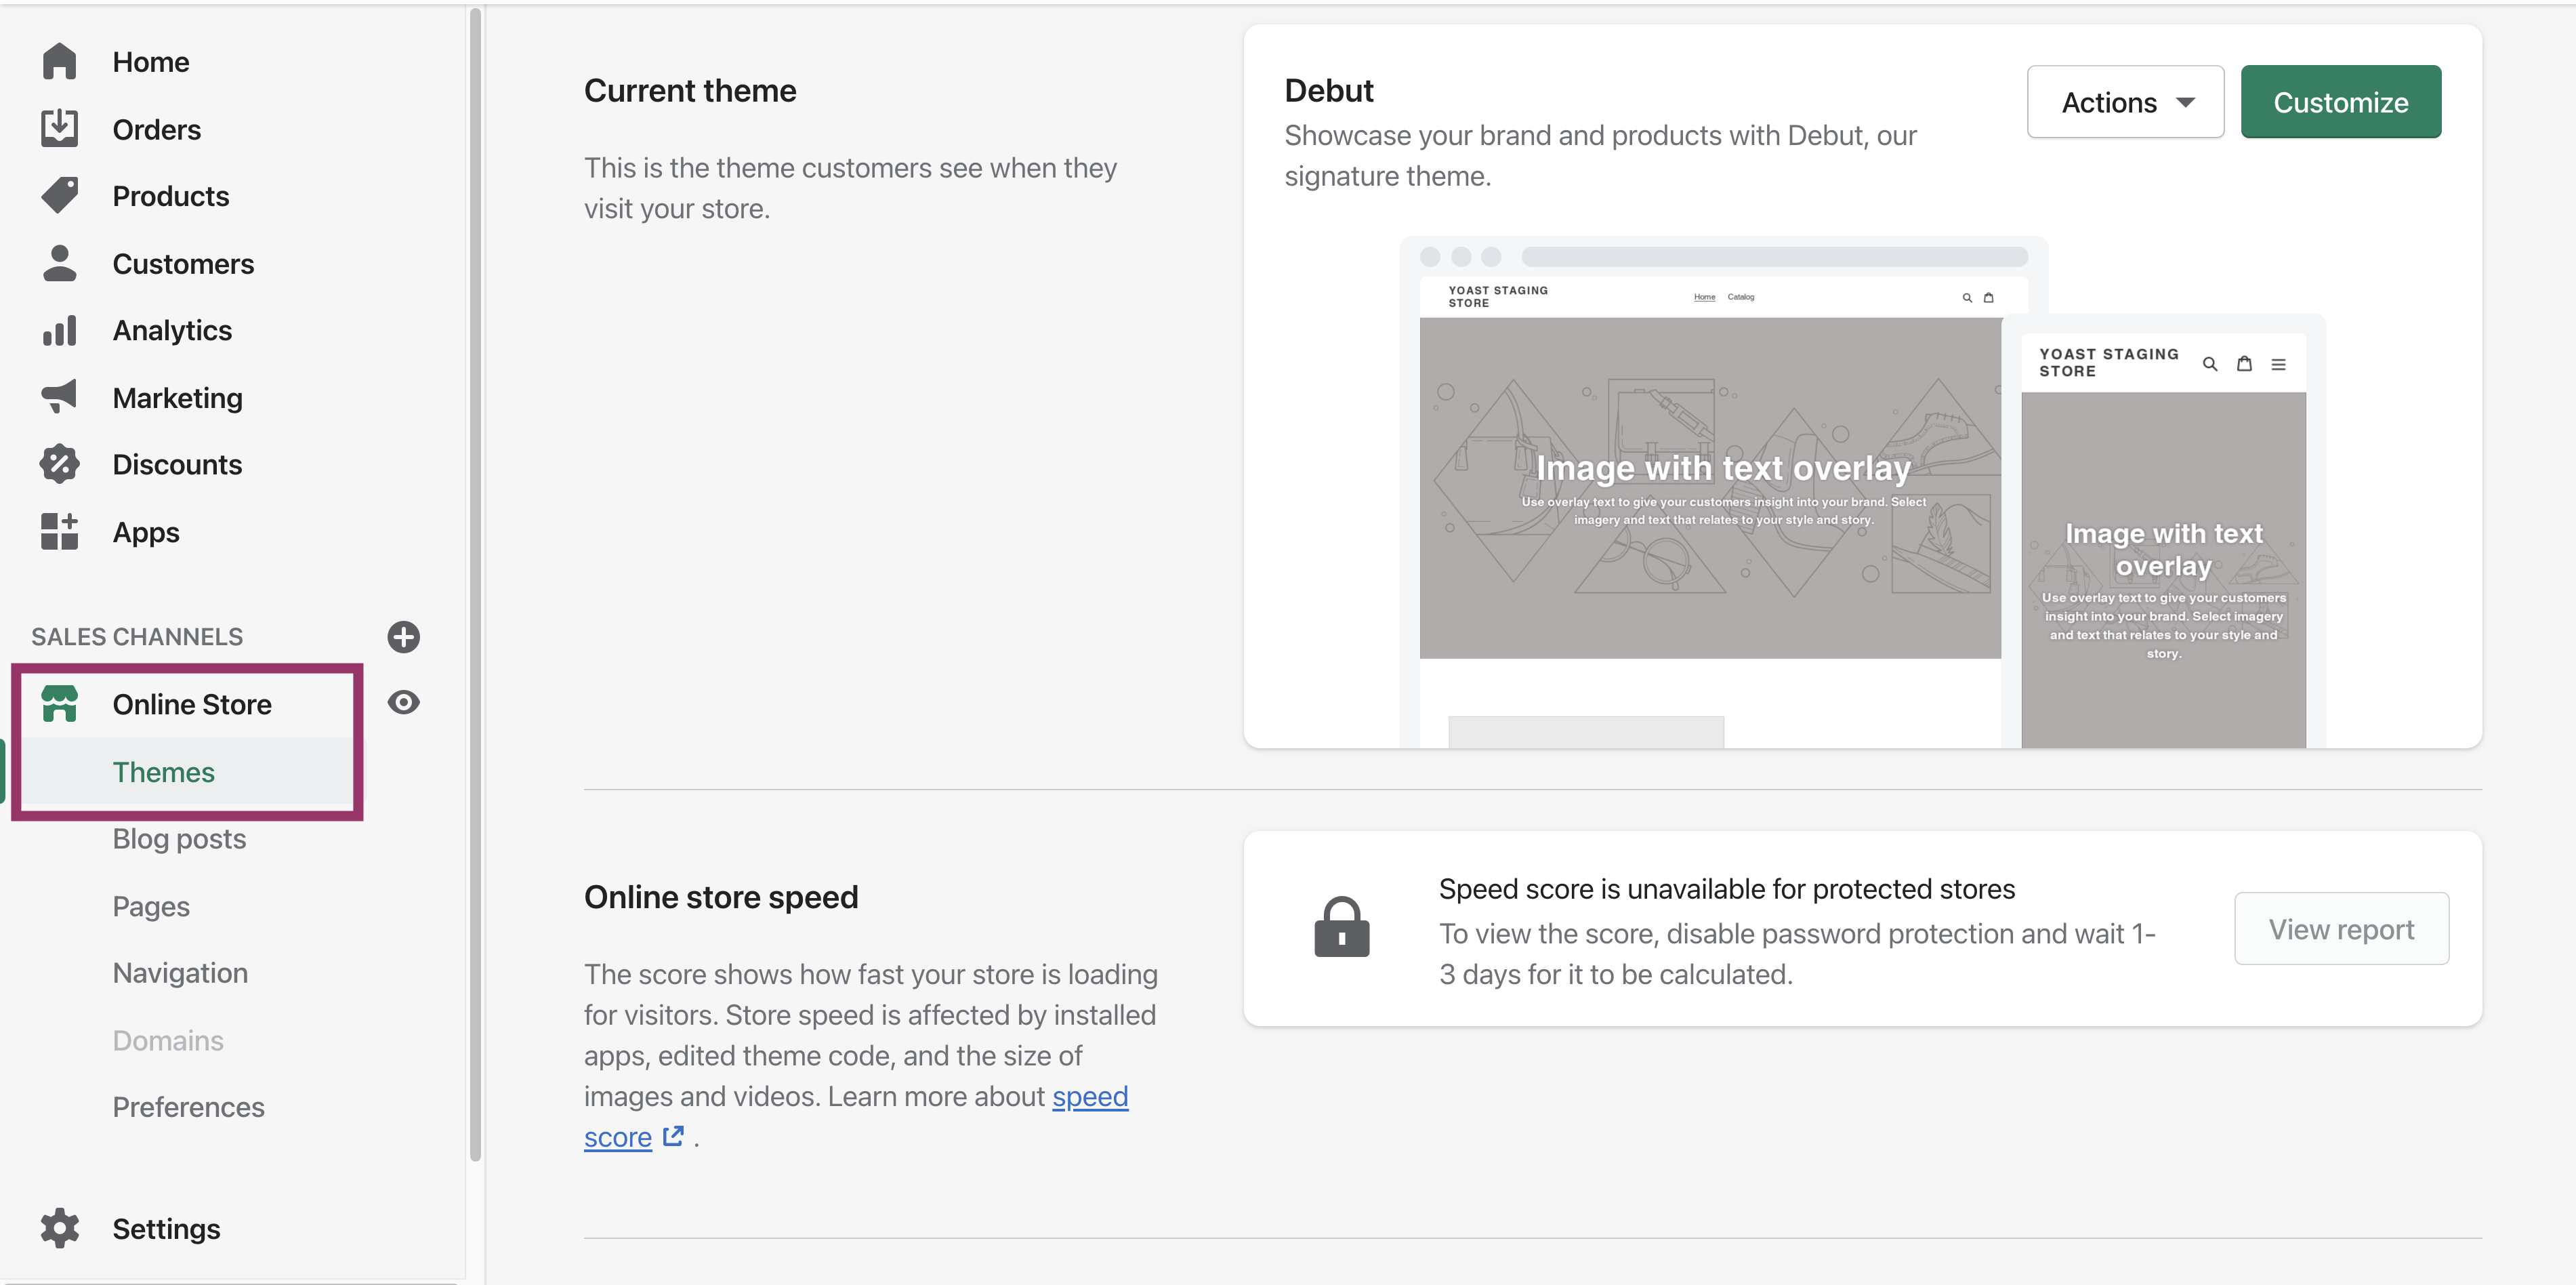
- Click the Action button available in your current theme and then select Edit code (outlined in the image below).
You will access the theme code editor.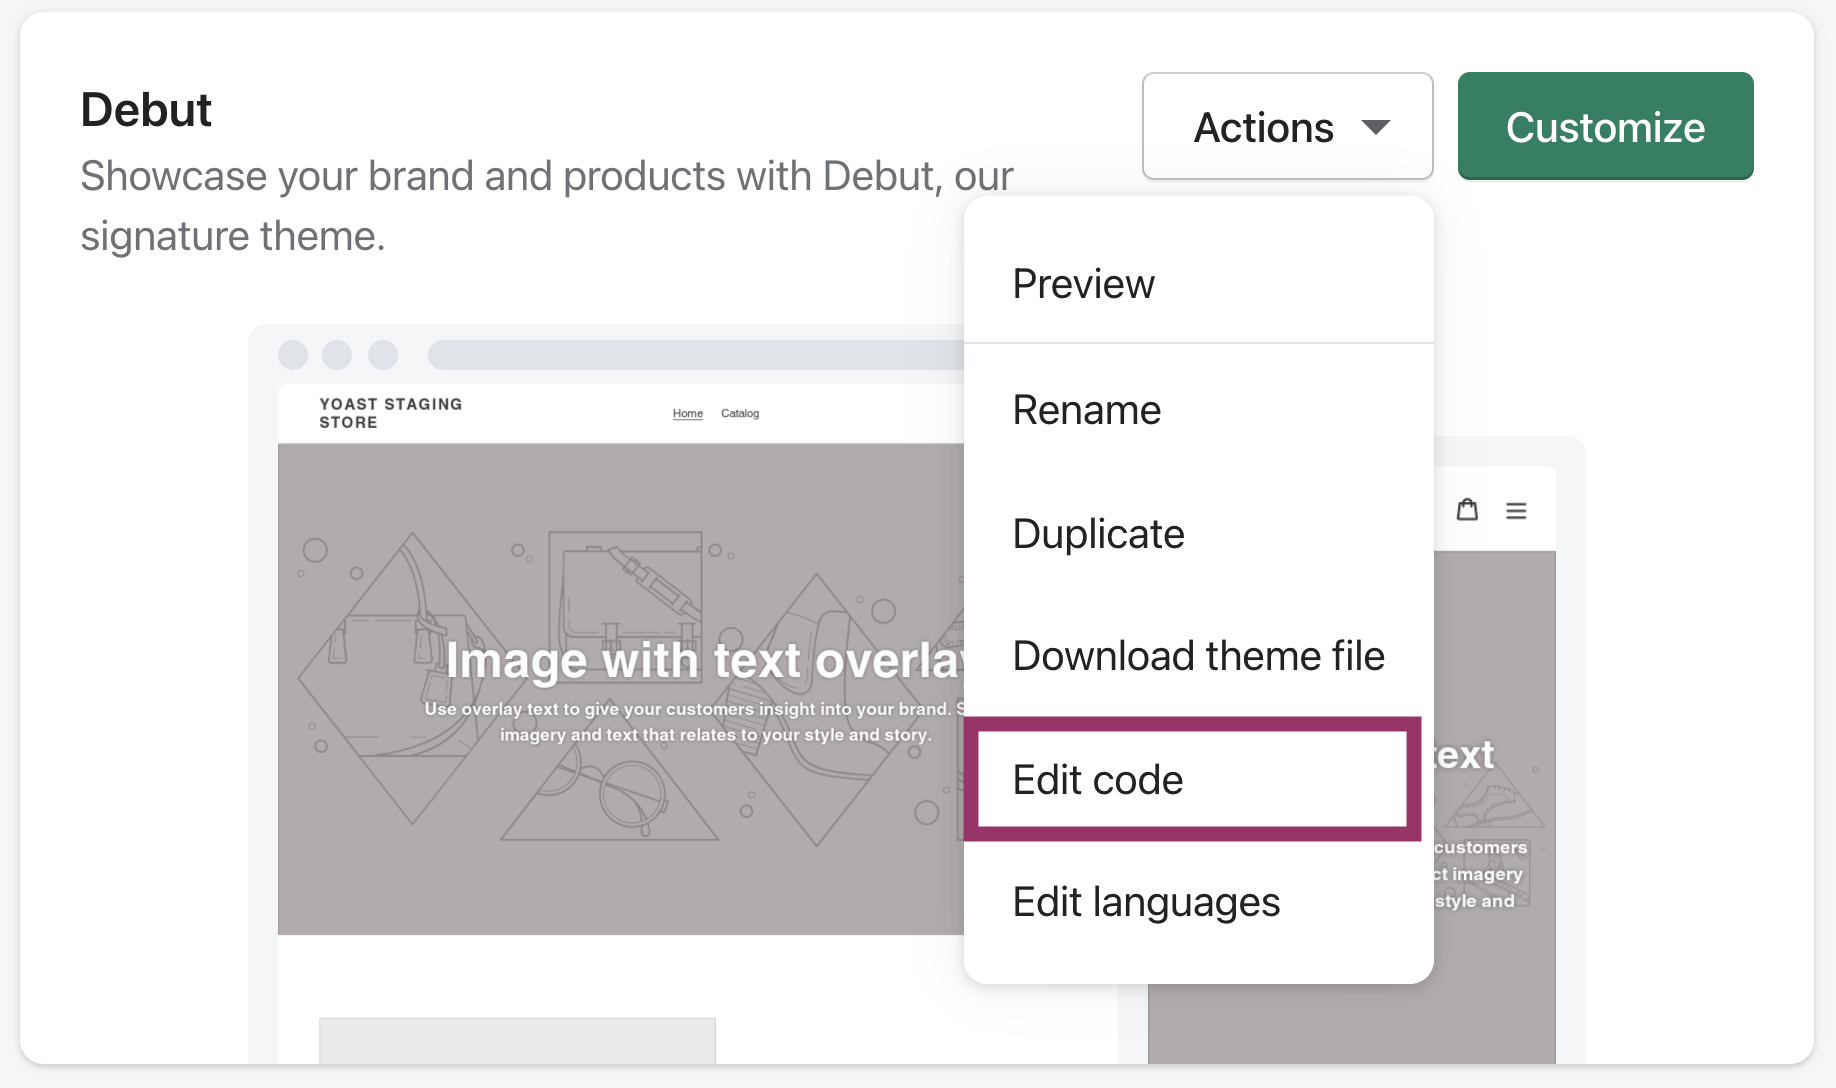
- Go to the Layout column. You will need to remove the code from the files located there. Note: your theme may have different files and file names.
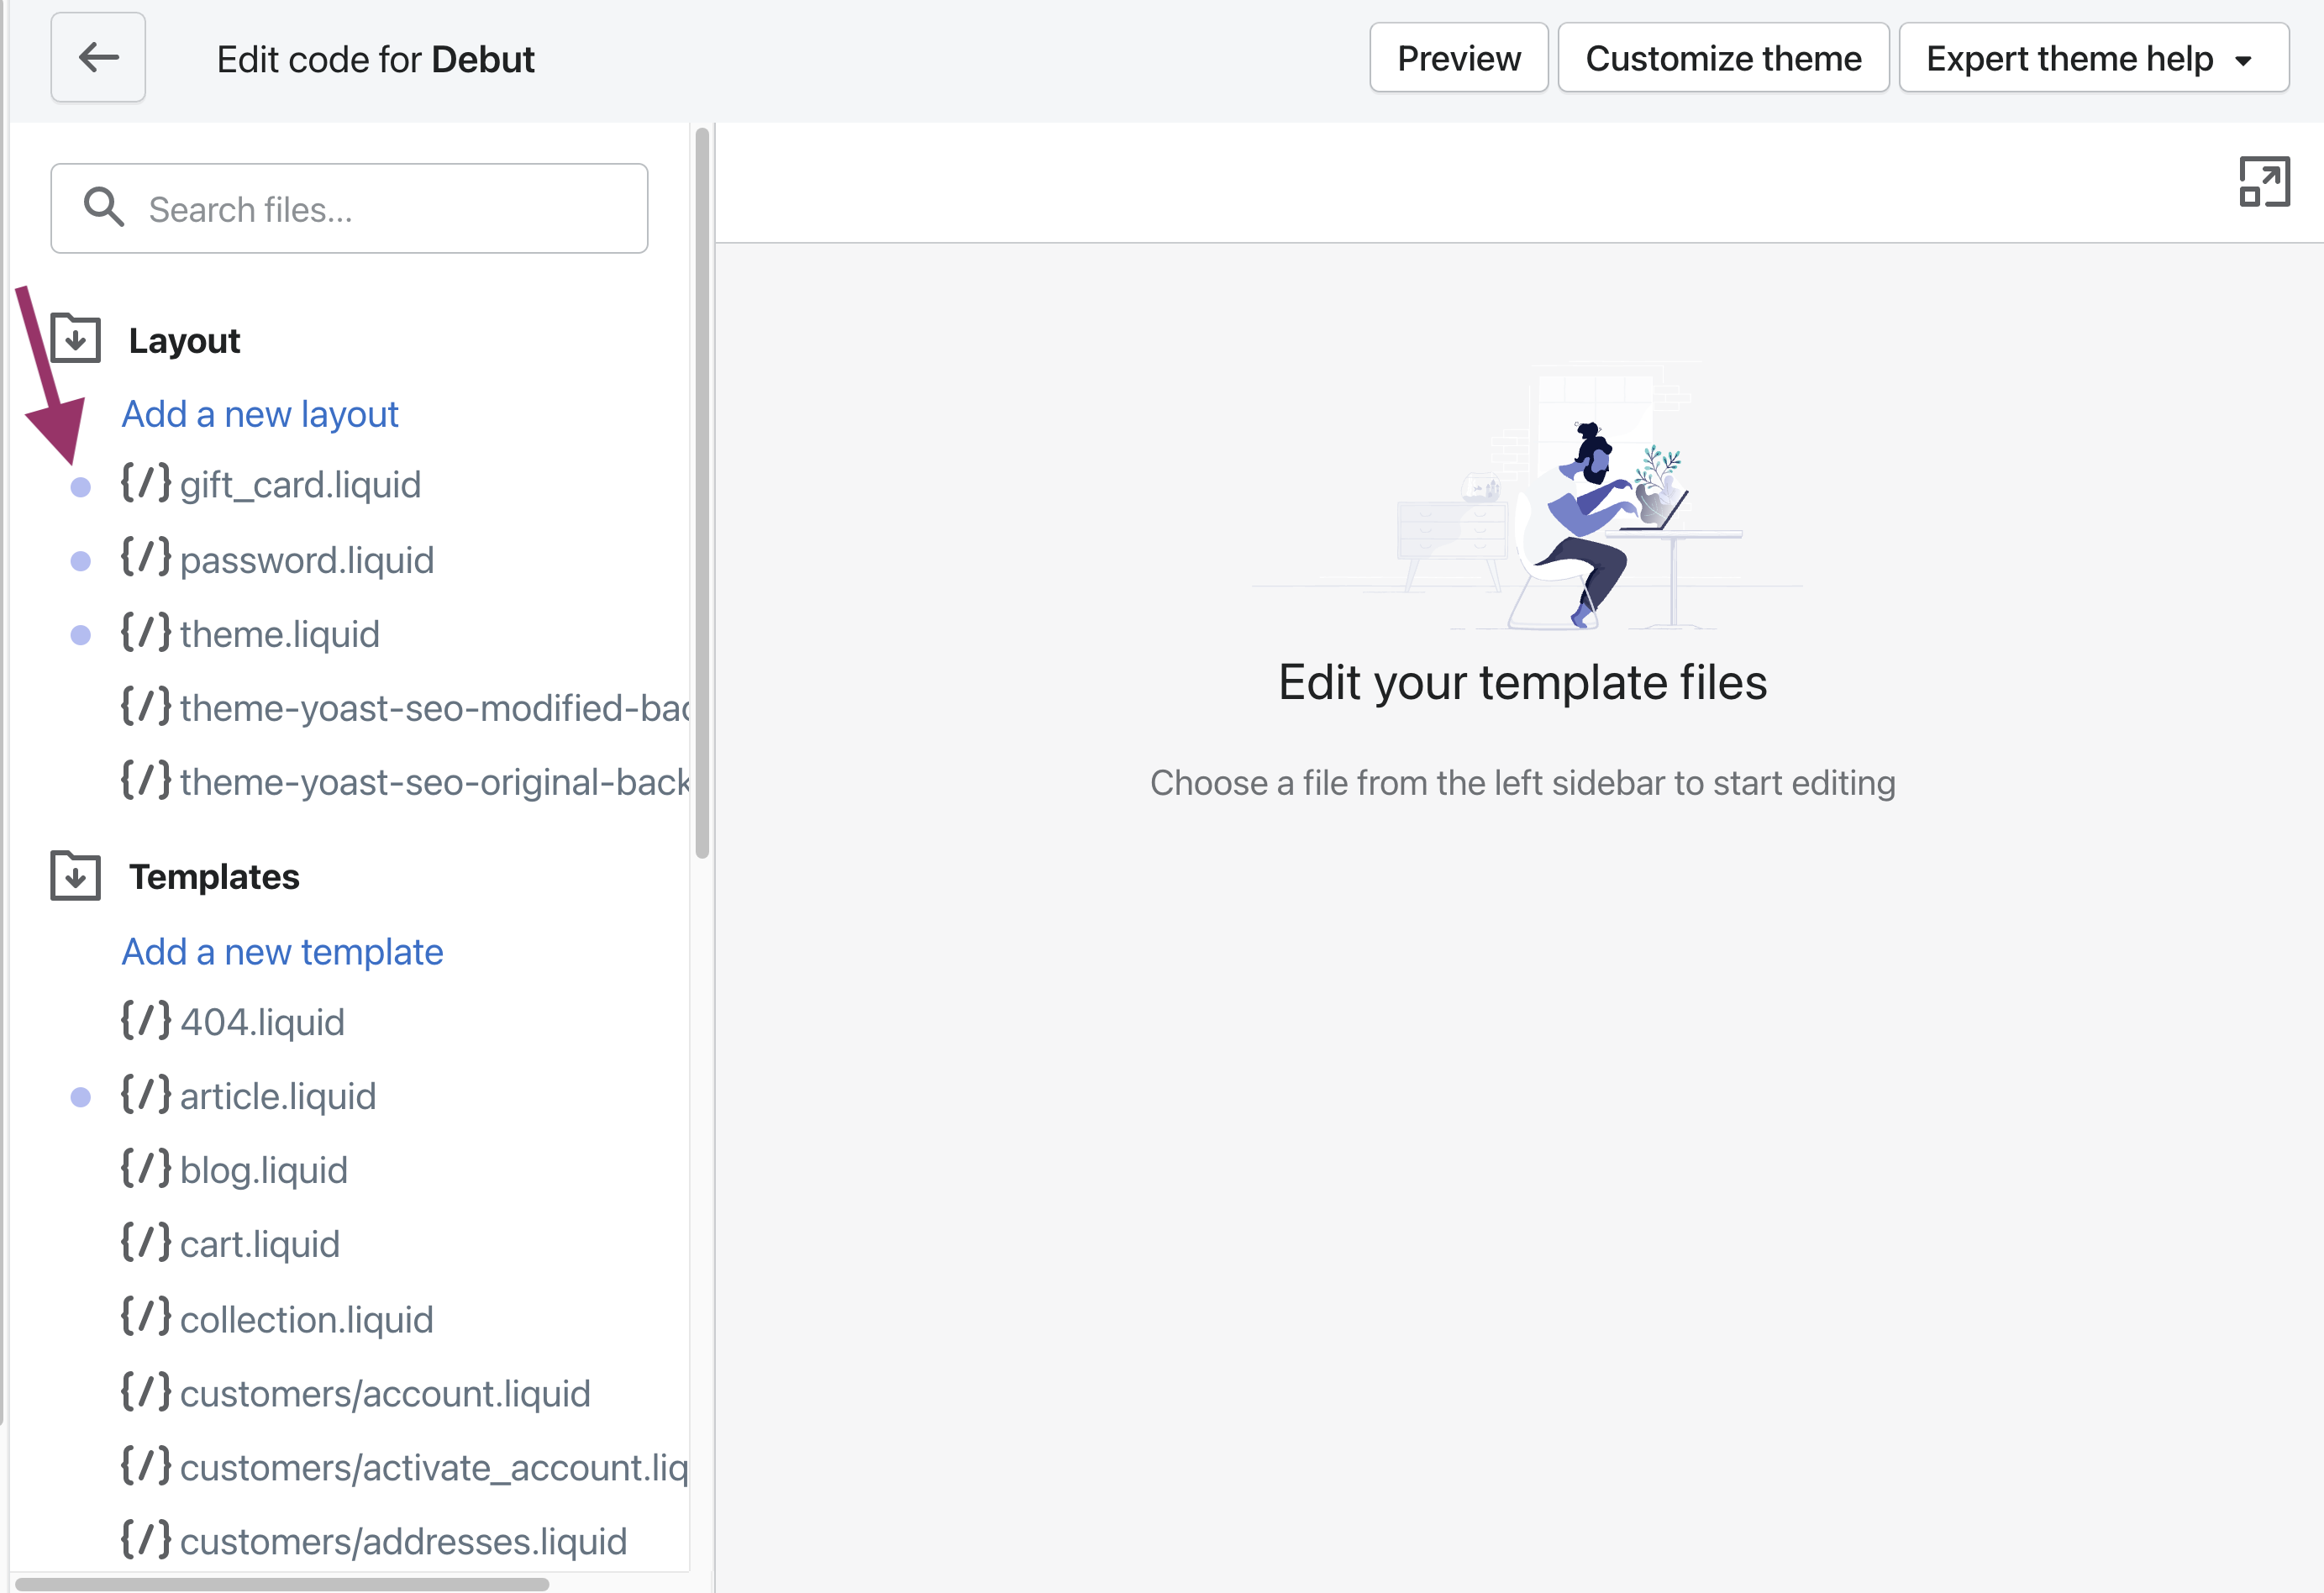
- Start by clicking the theme.liquid layout to open it.
You will see the theme code on the right side of the screen.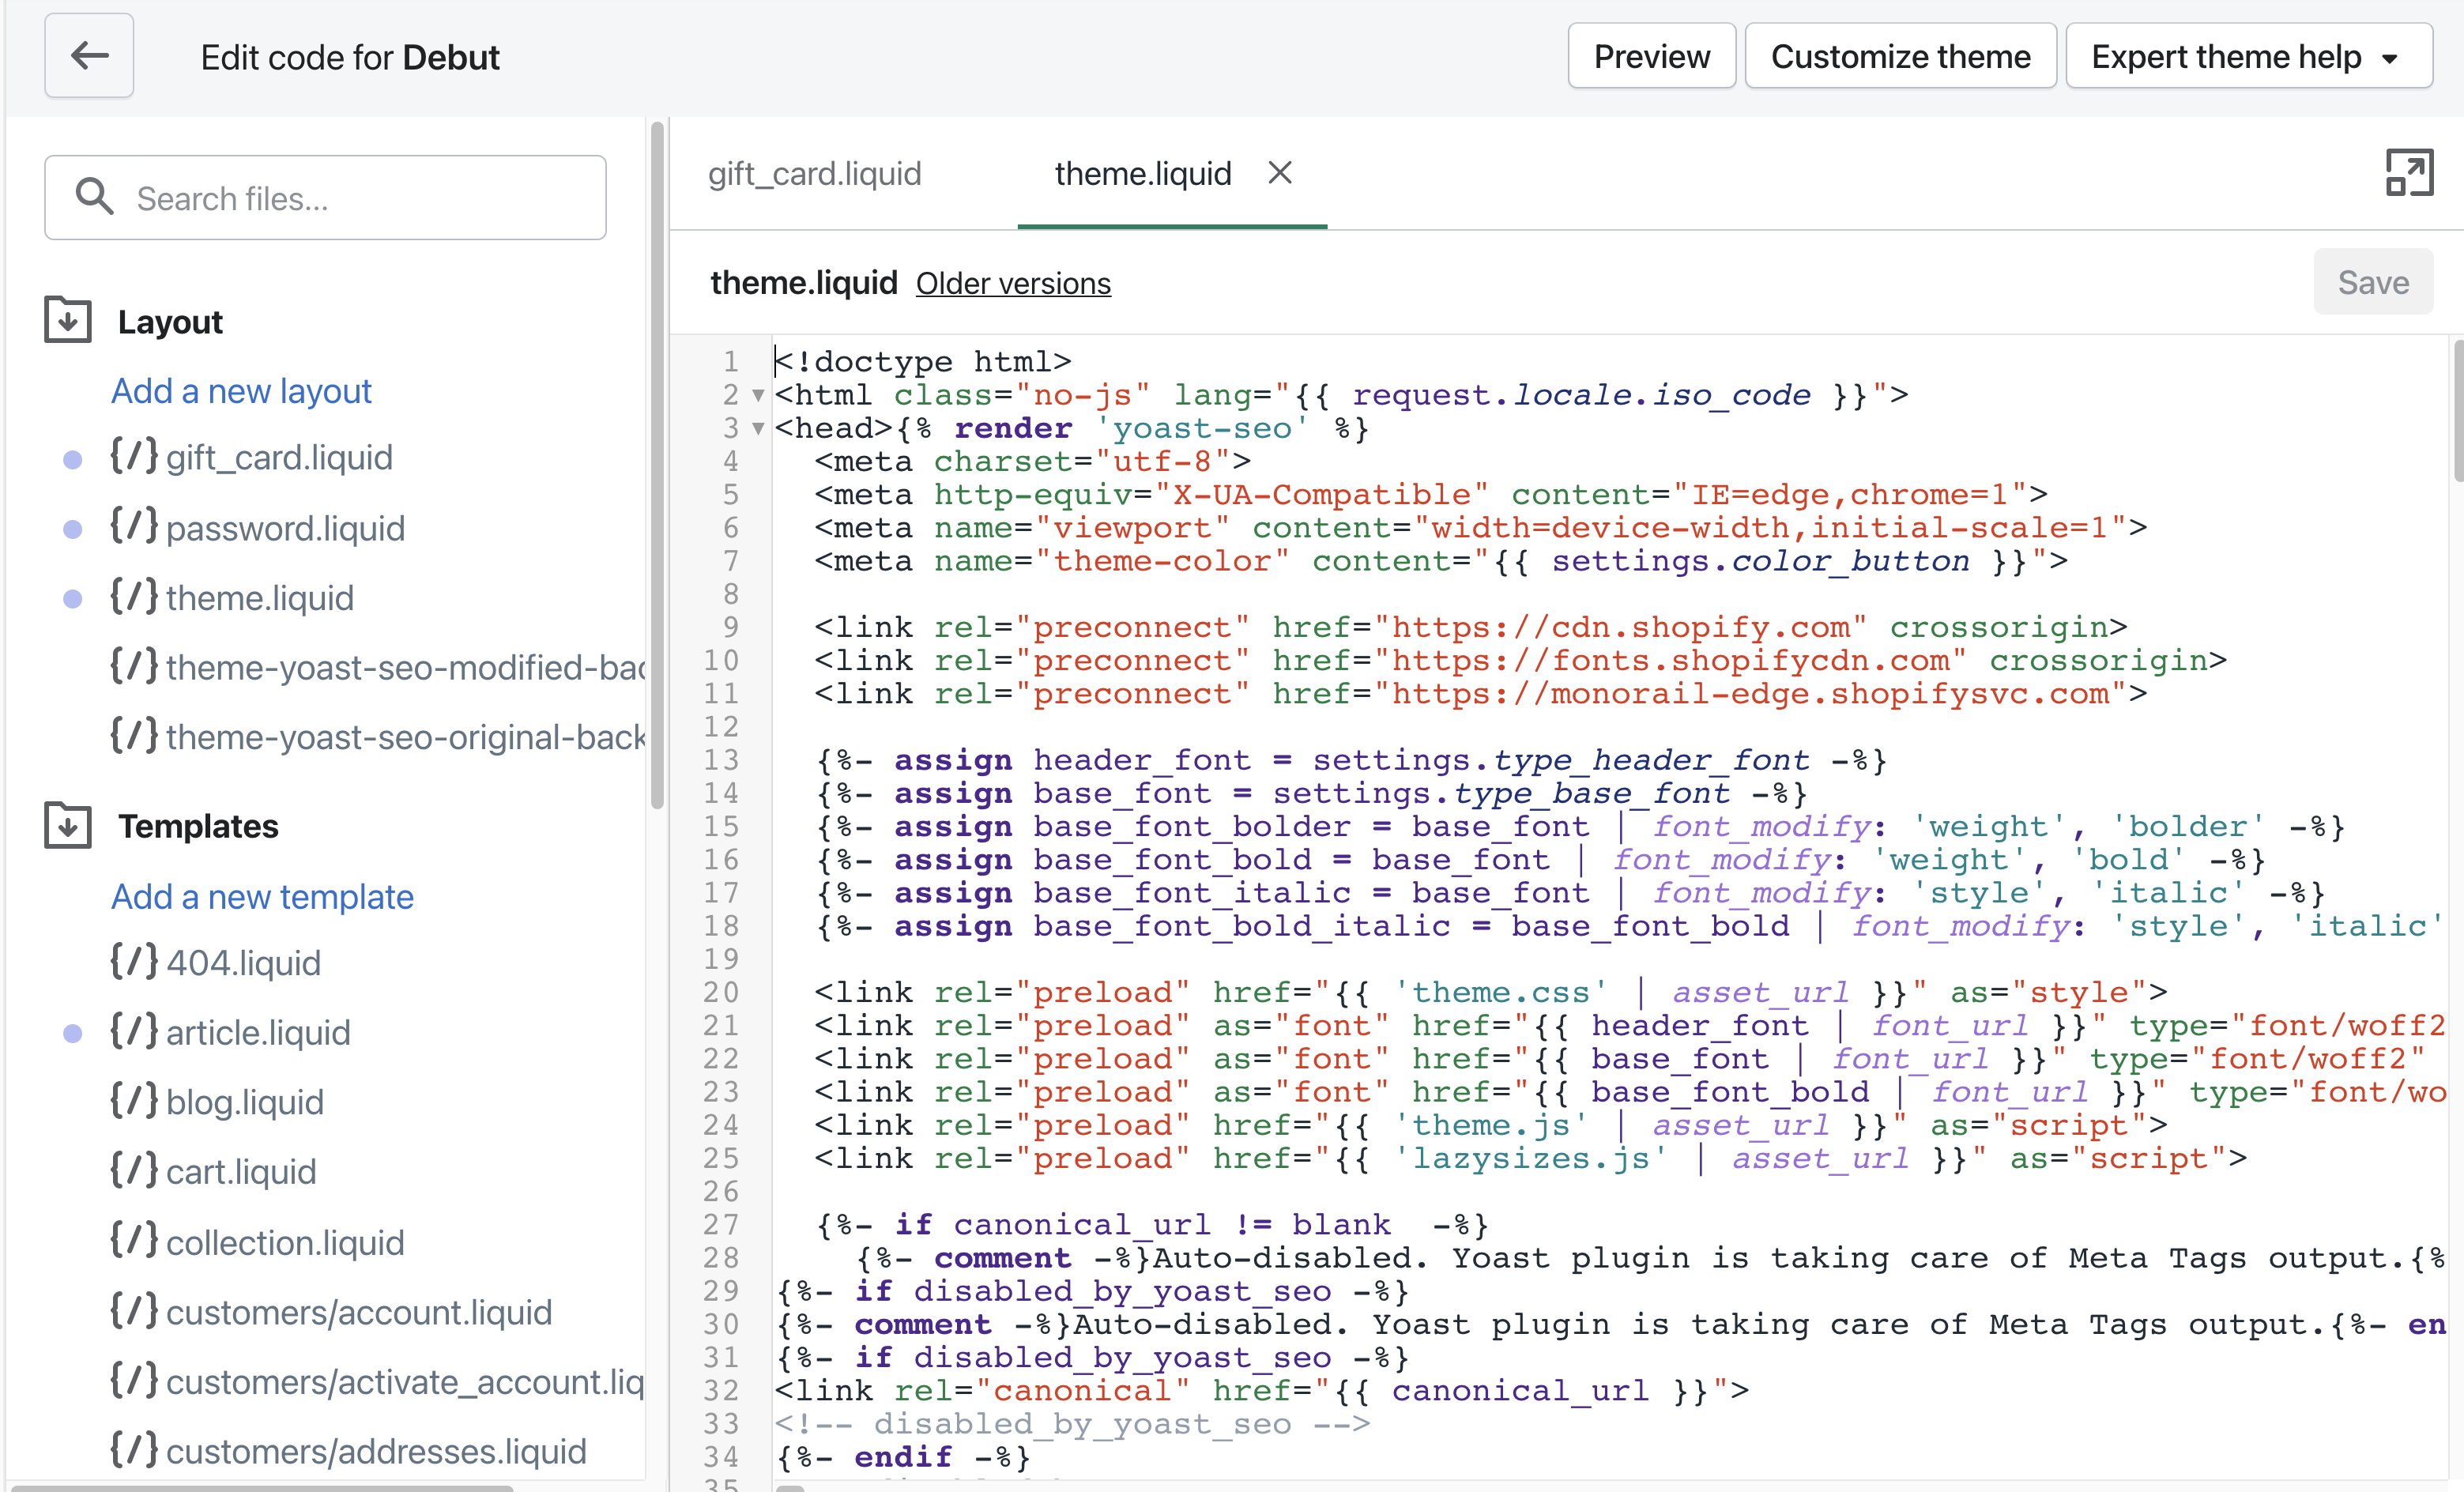
- Remove the
{% render 'yoast-seo' %}line of code from the<head>.
See line 3 in the image below. After you remove it, click Save.
- Inspect the source code of your webshop to make sure the changes have been made.
The code that Yoast SEO outputs is between the<head>and the<meta charset>tags. Check to see if it was removed. In the image below, you can see the difference in the source code before and after removing the code.
- To restore Shopify’s own SEO setup, you will need to add another code snippet to the
<head>.
Add the code snippet{% assign disabled_by_yoast-seo = true %}(see line 4 in the image below). This will make sure that the SEO tags that were previously disabled by Yoast SEO and replaced with the Yoast SEO tags will be set to their original state. Once you add the code, don’t forget to click Save.
- Repeat the same steps for the other files in the Layout section.
See step 3 for reference.
Related articles


Get more traffic to your Shopify store
Yoast SEO gives you the tools to make SEO easy and grow your store’s organic traffic and sales.