Google Search Console is a must-have tool for all site owners as it gives you an incredible amount of information about how your site is doing in search. We strongly advise you to add your website to Google Search Console to benefit from all the insights. Yoast SEO can help you verify your site to make the most of it. It only takes a couple of steps to connect your site to Google Search Console with some help from Yoast SEO. Let’s see how that works!
How to verify your site in Google Search Console with Yoast SEO
Adding your website to Google Search Console is straightforward — it just takes a few steps. Here, we’ll guide you through the process. First, you need to have a Google Search Console account. Don’t have an account? Sign up now for Google Search Console. Once you’ve done that, you can follow the steps below:
Go to Google Search Console.
Login or click ‘Start Now’, if needed.
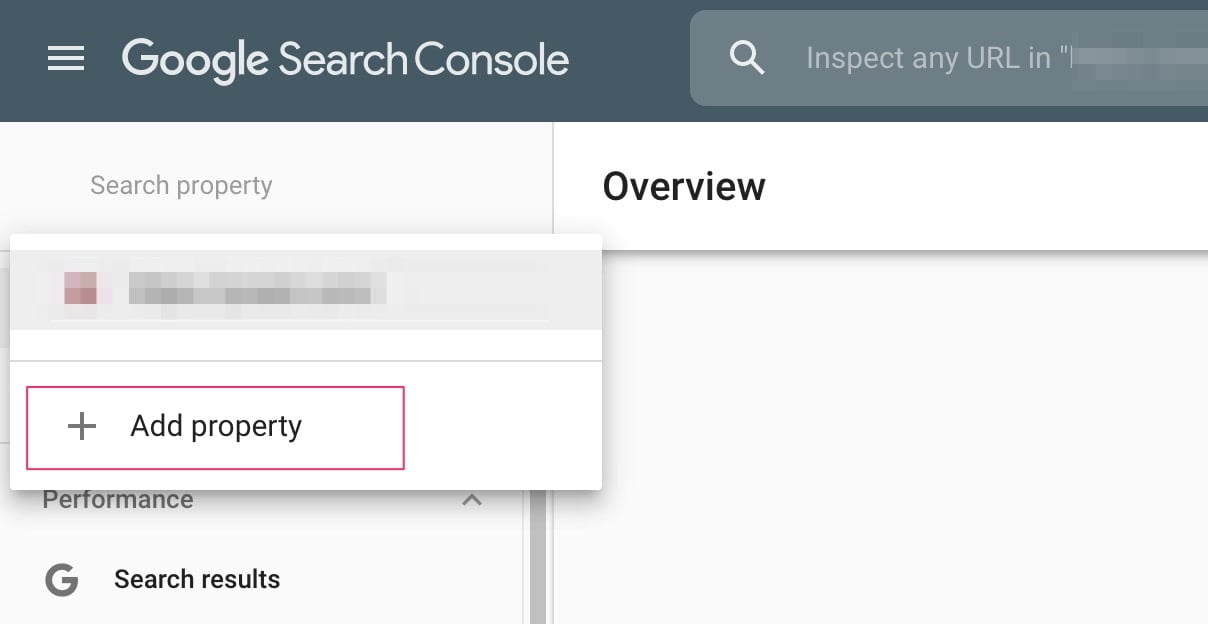
Click ‘Add a property’ under the search drop-down.
You can add up to 1000 properties to your Google Search Console account.
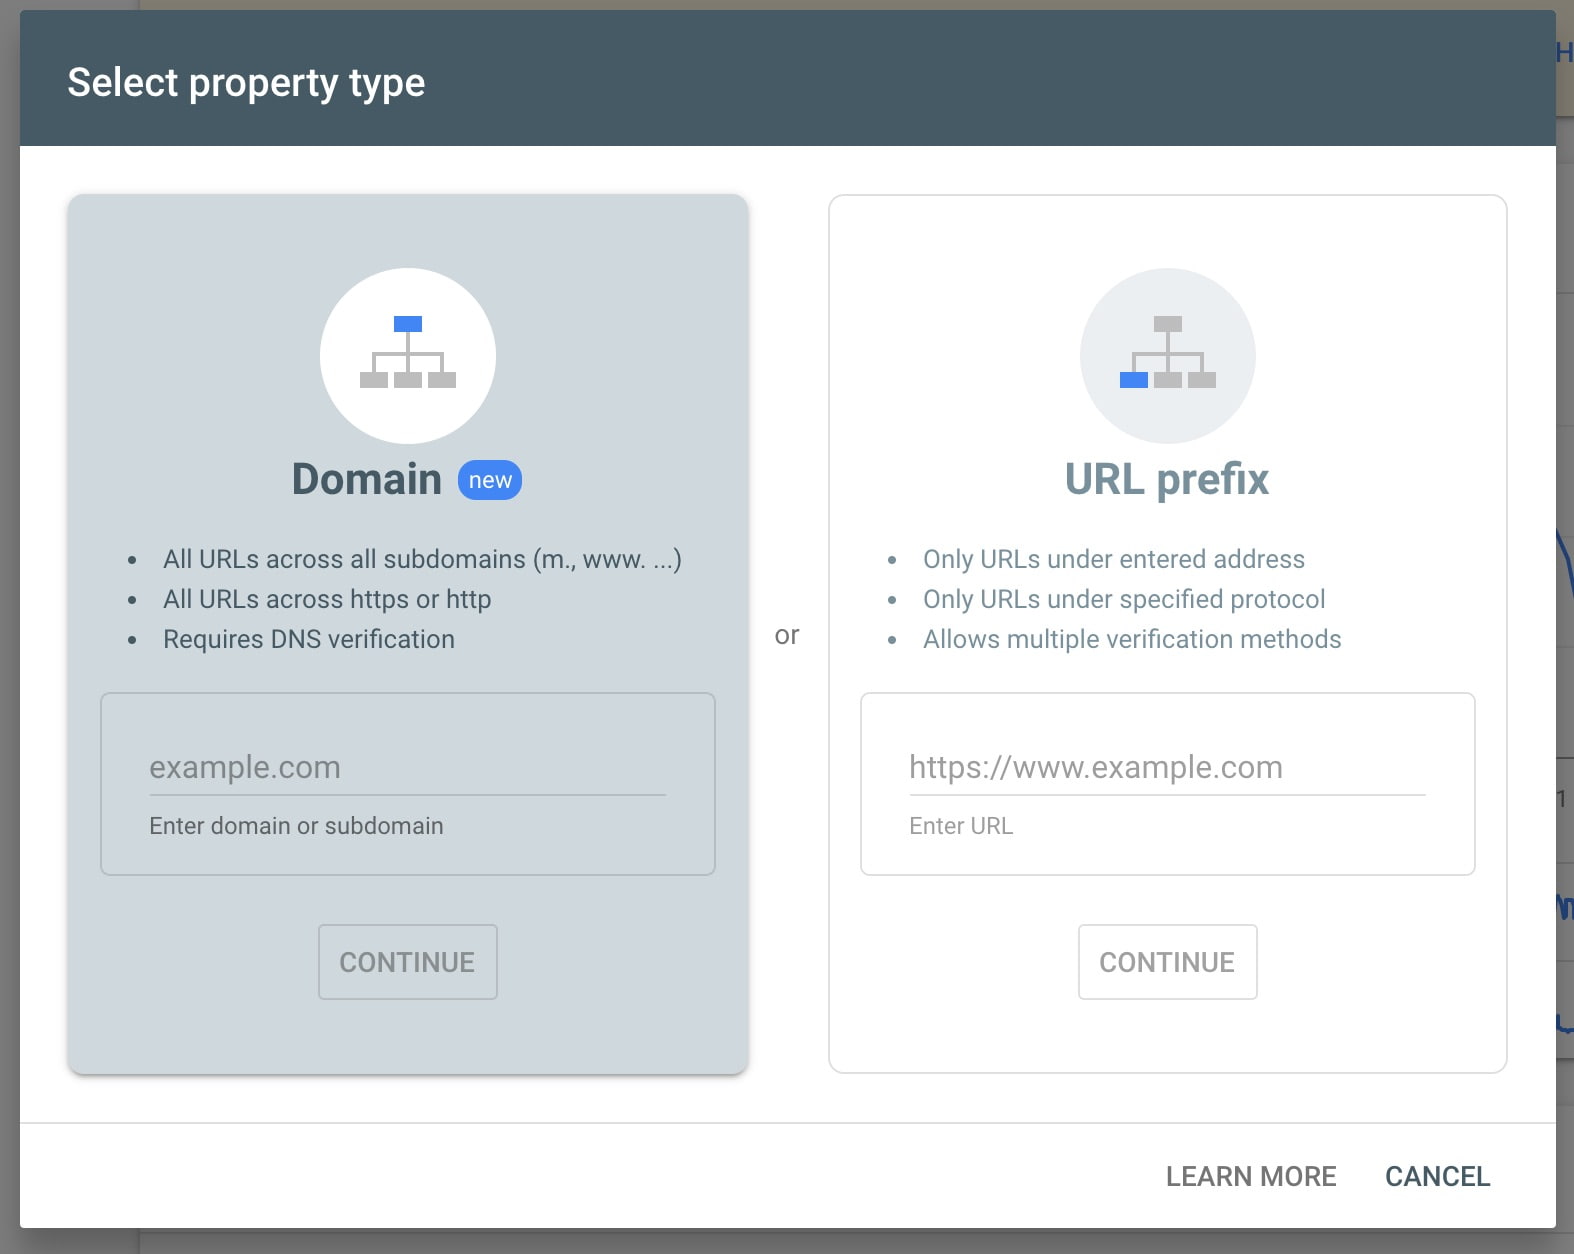
Select property type, enter your website URL, and click ‘Continue’.
Which option you pick is up to you. The Domain option is more flexible but harder to verify as it needs to do that with DNS. In this example, we use the URL prefix option. Please make sure you enter your complete URL. For example, if your site is https://yourdomain.com/ it needs to be that exact URL. Don’t forget the / at the end of the URL. If your site uses WWW or HTTP you need to add properties for those. Google provides multiple ways of getting your site verified and they even suggest adding multiple ways because of security. If you are not sure what your site has, please speak with your host provider.
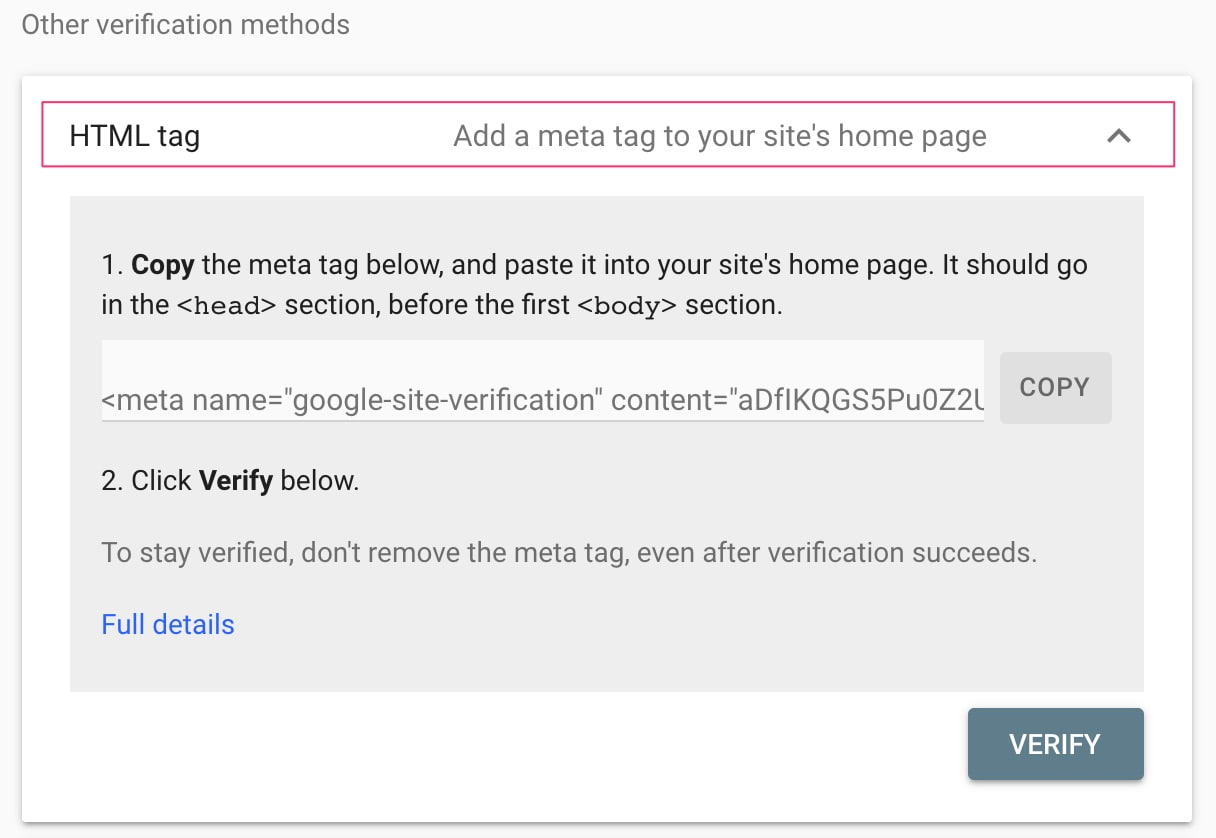
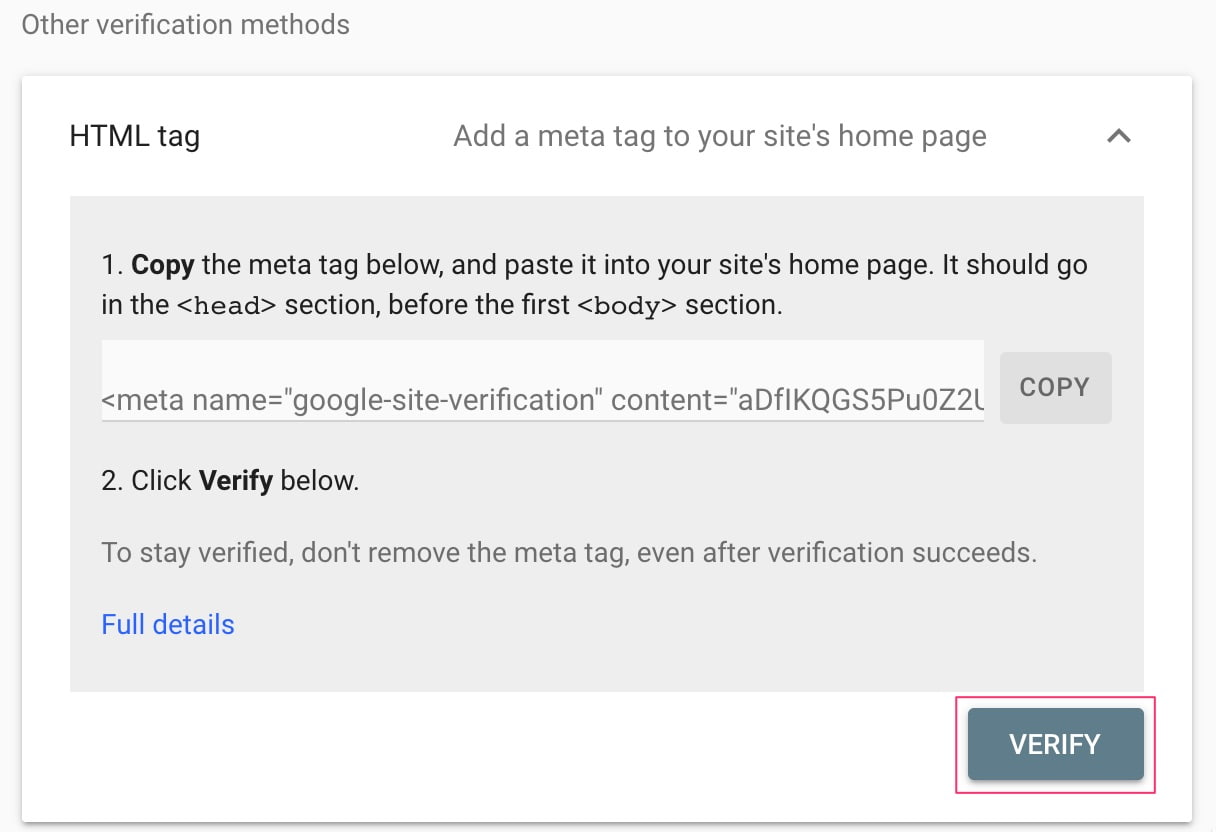
Click the arrow next to ‘HTML tag’ to expand the option.
There are several ways to verify your site, but we’ve made it easy. We only need the authorization code to paste it into Yoast SEO.
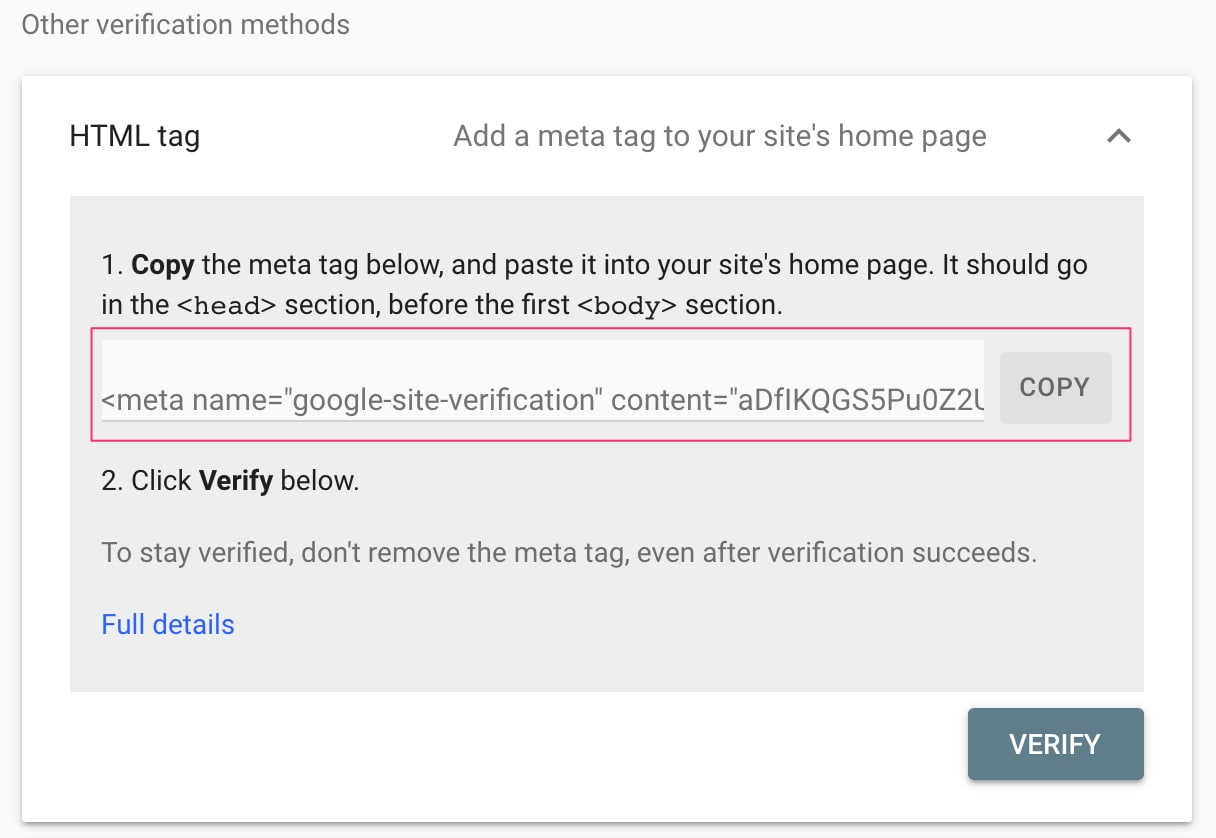
Copy the meta tag.
Highlight the entire meta tag code. Right-click on the highlighted tag and click on ‘Copy’ or use the copy shortcuts ctrl-c on Windows or cmd-c on Mac. We only need the long line of characters inside the content part to add your site to Google Search Console.
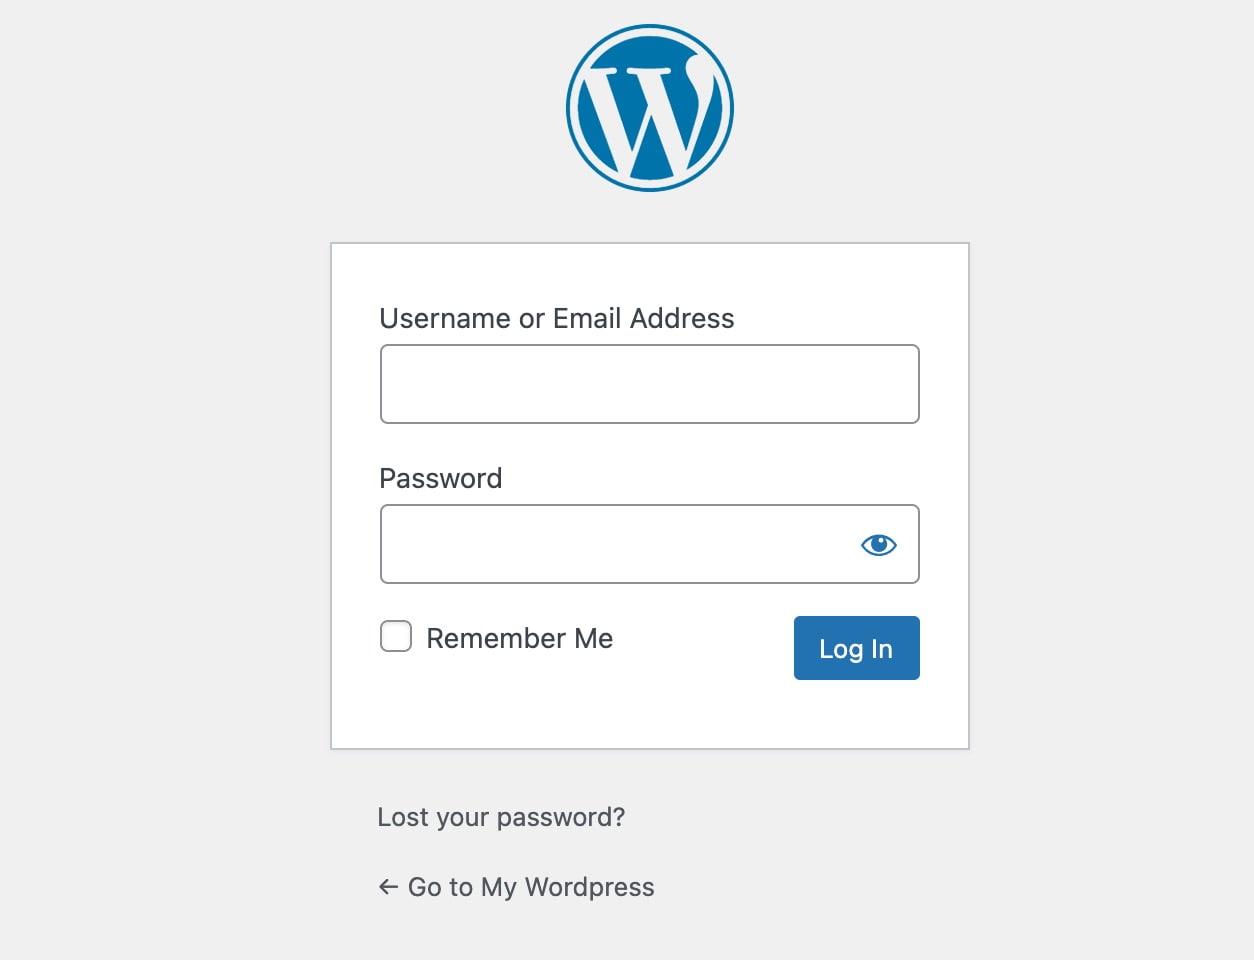
Log in to your WordPress website.
You will be in your ‘Dashboard’ when you’re logged in.
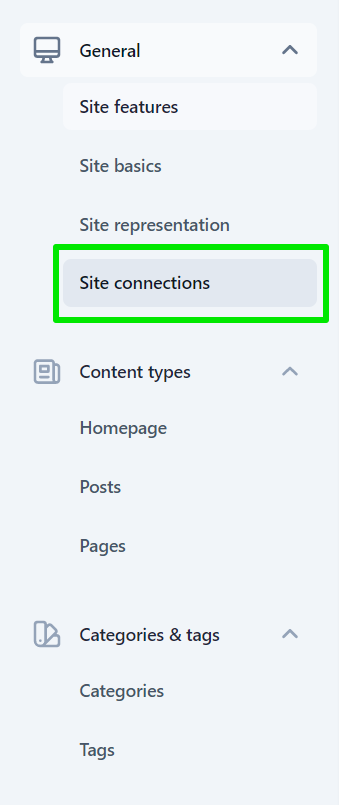
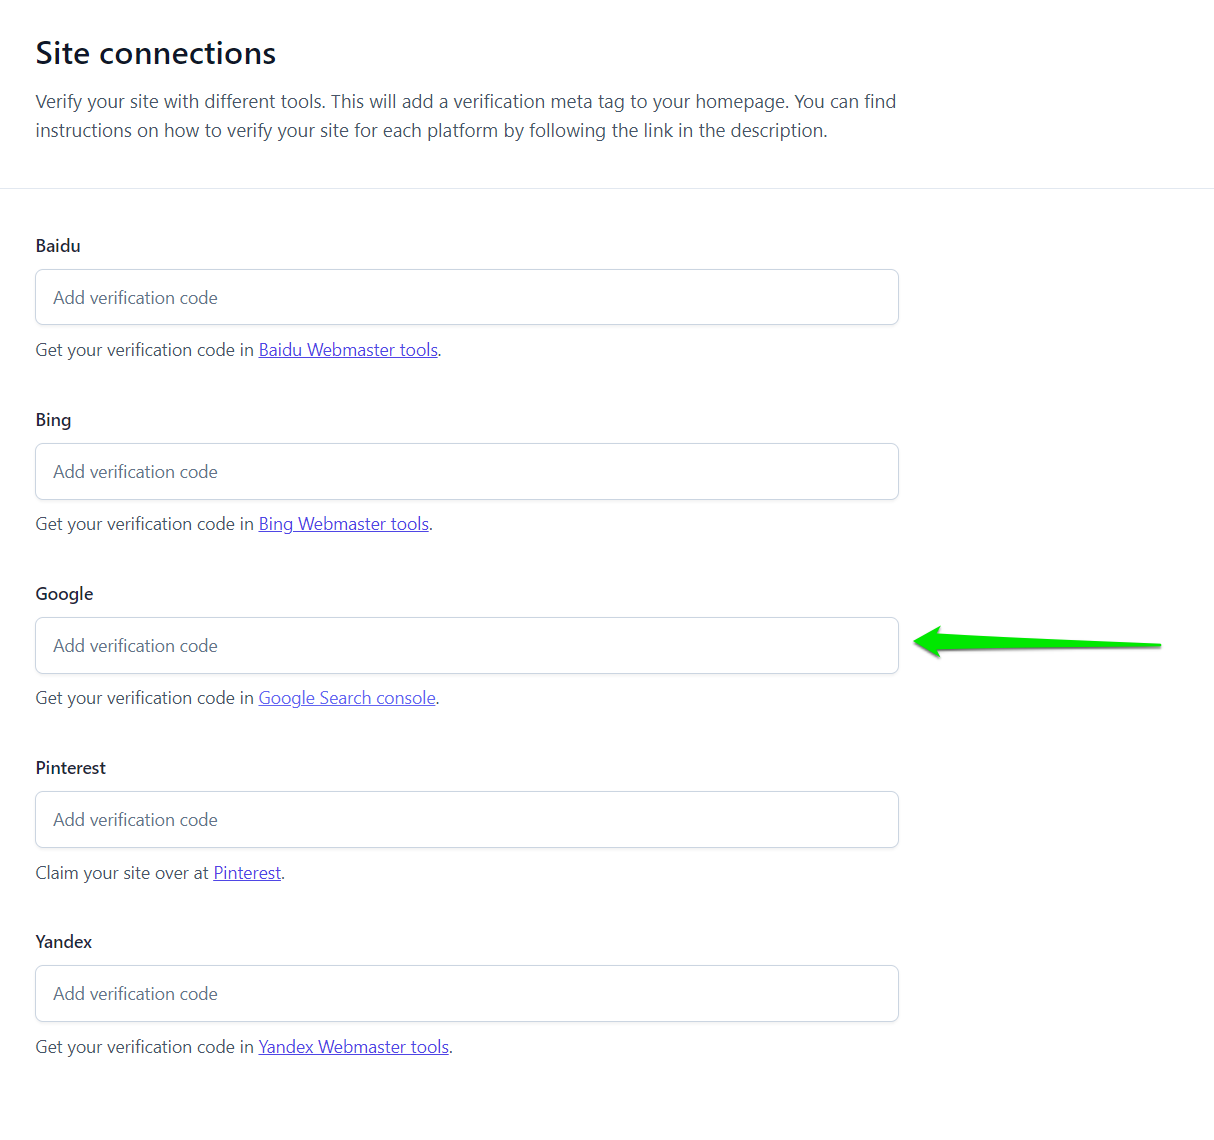
Click on ‘Yoast SEO’ > ‘General’.
On the left-hand side, you will see a menu. In that menu, click on ‘Yoast SEO’. After that, click on ‘Site connections’.
Paste the code in the Google field.
You only have to put in the range of random letters and numbers. After filling in the code in the Google field, hit the ‘Save changes’ button.
Go back to Google Search Console and click ‘Verify’.
Congratulations! You’ve connected your website to Google Search Console! Once you’ve verified and linked your site, you can submit your sitemap. Not to mention all the other cool stuff that’s Search Console capable of!
It’s easy to connect your website to Google Search Console
We’ve made it easy to connect your site to Search Console, and we strongly recommend you do so. Search Console gives you a wealth of information on your site’s performance. Not only does it show you what goes right, but, more importantly, what goes wrong. The advice you get is very actionable, and most things are easy to follow up on.
PS: How to check your verification tag in Search Console
If you need to check your verification, you can do so easily by following the steps below:
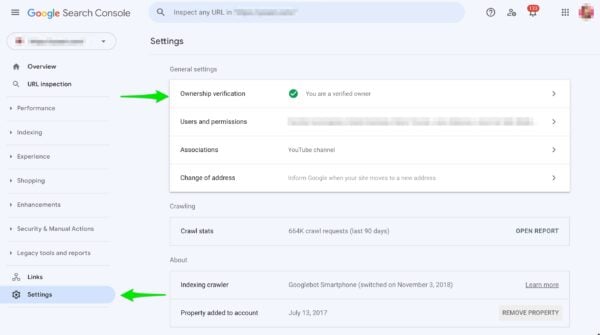
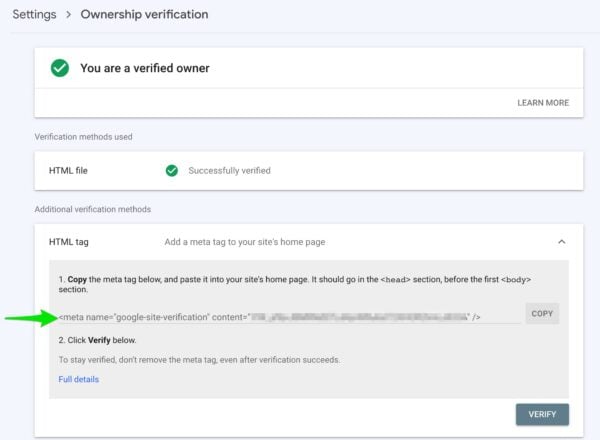
Go to Google Search Console, and open the Settings
Click ‘Ownership Verification’ and click ‘HTML tag’ to check the verification tag
Use it to your advantage
Once this is all figured out, your Google Search Console should be primed and ready to go! Google Search Console is a must-have tool for all site owners as it gives you an incredible amount of information about how your site is doing in search. We strongly advise you to fully connect your website to Google Search Console to benefit from all the insights. For more help fixing your site, Yoast SEO Premium comes highly recommended.
Buy Yoast SEO Premium now!
Unlock powerful features and much more for your WordPress site with the Yoast SEO Premium plugin!
June 13 - 15, 2024
Team Yoast is at Attending, Organizing, Sponsoring, Volunteering WordCamp Europe 2024! Click through to see who will be there, what we will do, and more!
See where you can find us next »
30 April 2024
Get expert analysis on the latest SEO news developments with Carolyn Shelby and Alex Moss. Join our upcoming update! 📺️
All Yoast SEO webinars »
5 Responses to How to add your website to Google Search Console
Lars • 3 years ago
Is it really NOT (yet) possible to connect Search Console with Google Analytics 4 (GA4) ? When will it be? Does anyone know?
Saeed Ahmed • 3 years ago
thank you so much after long research I have found the right article. I was want to add a search console on my website
Camille Cunningham • 3 years ago
Hi there, Saeed! You’re very welcome and lots of luck with adding your website to Google Search Console :)
Priya Gupta • 3 years ago
Thank you Yoast SEO, you can solve my problem by adding a website in Google Search Console.


Is it really NOT (yet) possible to connect Search Console with Google Analytics 4 (GA4) ? When will it be? Does anyone know?
thank you so much after long research I have found the right article. I was want to add a search console on my website
Hi there, Saeed! You’re very welcome and lots of luck with adding your website to Google Search Console :)
Thank you Yoast SEO, you can solve my problem by adding a website in Google Search Console.
You’re welcome, Priya!